-
Template Parameters
- Adding your logo image
- Adding your logo text
- Applying custom CSS to a screensize/device
- Converting the top menu to a module position
- Editing content fonts
- Editing the Body/Default Font Size
- Editing the Template Width
- Editing your Copyright Information
- How to access your Template Parameters
- Module Style Overrides
- Setting up your Social Media Icons
- Understanding Layout Options
- Understanding Module Widths
- Using the Custom Code fields
- Using the Custom CSS field
Custom CSS allows you to alter certain aspects of your templates styling. It is common that you may wish to apply such CSS to only certain screensizes or devices. To do so we have included a number of fields which can be found in the Responsive Options tab of your template settings.
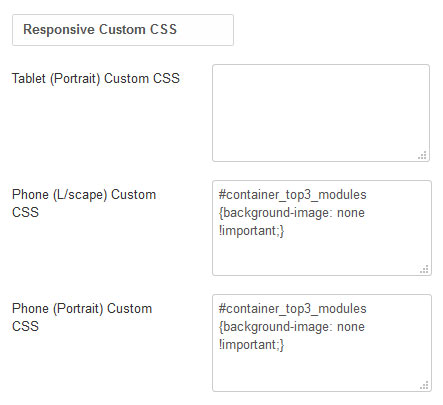
- Navigate to Extensions -> Templates -> Styles -> [YourTemplateStyle] -> Responsive Options
- Add the CSS the corresponding field of the screensize you wish to change
- Click Save
It is important to note that if you wish to apply CSS to all screensizes less than a certain size you must add that CSS to each field belows that screensize. So for example if you wish your CSS applied to all screensizes less than tablet portrait you must added the same CSS to Tablet (Portrait), Phone (L/scape) and Phone (Portrait).
Module Style Overrides allow you to tweak the styling of individual module positions. This greatly extends the control of how each of your module positions are displayed and include a host of styling options including background color, background image, text color, heading color, button color and module padding. In this tutorial we will detail how to apply these module position styling overrides to your template.
- From your Joomla administration navigate to your template style settings (Extensions -> Templates -> Styles -> [YourTemplateStyle].
- Select the Module Style Overrides tab.
- Create a new override by clicking the plus (+) icon.
- From the Position dropdown, select the module position to which you wish to apply the style override.
- Using the options available style the module position to your own taste.
- Background Image: Applies an image of your choice to background of your module.
- Background Color: Applies the color of your choice the background of your module.
- Headings/Title Color: Sets the color for module headings (H1, H2, H3 ect.) and module title.
- Text Color: Sets the default text color for your module.
- Button Color: Sets the default color for module buttons
- Padding: Sets the padding for your module position. Usually your module position will already have padding applied by the template. This option will allow you to override that padding.
- Margin: Sets the margin for your module position. Note the difference between padding and margin is best noted when you have a background image or color set. Padding is recognised as spacing within the background image.color while margin is recognised as spacing outside the background color/image.
- Once set, hit Save and refresh your frontend to see your newly created module style override in action.
If you wish to apply a Module Style Override to a single page or menu item, a solution is to create a template style specifically for that menu item/page. For details on this topic may I suggest the following article.. Creating multiple template styles (https://www.joomla51.com/tutorials/joomla-basics/creating-multiple-template-styles)
Social media has become a very important part of any website, helping to promote your site and to communicate to your clients. For the majority of our templates we have included an area to which you can add icons linking to your social media pages. These icons have been carefully styled to blend in seamless with the look and feel of each template and are prominently placed within each design to be easily found by your website visitors. Icons can be easily and quickly set up from within the 'Social Media' tab of your templates parameters.
- Navigate to your template style parameters (Extensions -> Template Manager -> [YourTemplateStyle]
- Select the 'Social Media Icons' tab
- Enter the URL(s) to your social media pages in to the corresponding field
- 'Save & Close'
Note: Icons will automatically be enabled once its corresponding field is not empty. If you find an icon displaying when its corresponding field appears blank please ensure that you have not inadvertently add a space (spoacebar) within its field.
In our more recent template releases we have started using the FontAwesome font set instead of images to render the social media icons. This has brought with it a number of benefits.
- Smaller file size
- Scales to any size without loss of clarity
- Looks great on retina displays
- Improved coloring options
- Wide selection of icons to choose from (500+)
Along with fields for each of the more popular social media icons, templates using the FontAwesome font set include the option to add any of the 500+ FontAwesome icons.
- At the bottom of the 'Social Media Icons' tab click the 'List/Add Custom Icons' button
- Using the +/- create a row of fields for each custom icon you wish to implement
- In the 'Custom Icon' column add the FontAwesome class for the icon you wish to use (eg. fa-coffee). A full list of the FontAwesome icon class names are available at http://fortawesome.github.io/Font-Awesome/icons/
- Under the 'Icon Title' add the title to your icon. This title will displayed as a tooltip when a user hovers over the icon.
- Under the 'Icon URL' column add the URL you wish the icon to link to.
- Under the 'Icon Color'/'Icon Hover Color' column add the color/hover color for your icon.
- Click 'Save'
- Click 'Save & Close'
Note: It is important to click save on both the 'List/Add Custom Icons' modal box and within your template style for your changes to take effect. To avoid any issues like blank icons appearing I would also suggest removing any empty rows within the 'List/Add Custom Icons' modal box using the '-' button.
On all of our more recent template releases, the main top menu is rendered by the template rather than via a module position. This allows you to set the menu to display through the templates parameters instead of having to create a menu module. Although this option does simplify and save time when setting up your website, you may have need to display your menu via a module. An example of such an instance would be if you wish to implement some of the settings available with the menu module which are not available within the templates parameters (Module Class Suffix, Language, Sart Level, End Level etc). Antoher instance where you may wish to use a menu module rather than the menu rendered by the template is if you wish to create a number of menus for a multi language.
Considering this we have added an option to convert your templates main menu to a module position within your templates parameters. Simply navigate to Extensions -> Template Manager -> [YourTemplateStyle] -> Menus and set the 'Convert to Module Position' option to 'Yes'. Once enabled your top menu will replaced by a module position called 'hornav'. A menu module can then be created in this position by navigating to Extensions -> Module Manager -> New -> Menu. You'll find that the 'hornav' position may not be listed in the positions dropdown within your modules parameters so simply type it in to create (hornav).
For some of our templates Javascript was used to create an animated effect on the sub menu items dropdown. To apply this Javascript to a menu module in the 'hornav' module position simply add 'moomenu' to the 'Menu Tag ID' field of your menu modules settings ('Advanced' tab). This applies to the following templates:
Within the template parameters of some of our more recent releases you will notice a Custom Code tab. Under this tab you will see two fields allowing to you add your own custom code to your template. A popular example of the type of code would be Google Analytics tracking code which allows Google to track the traffic to your site.
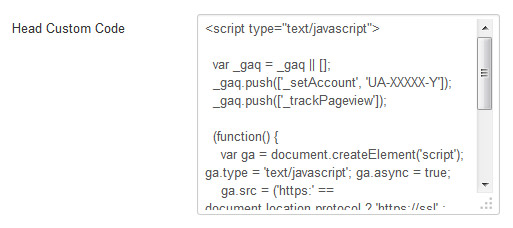
Head Custom Code
Any code added to this field will be placed between the <head> .. </head> tags of your template, specifically just before the closing </head> tag. Note that this code will be added to every page of your site which uses this template style.
Body Custom Code
Code added to this field will be placed within the<body> .. </body> tags of your template, specifically just before the closing </body> tag at the end of your template. Once again this code will appear on every page which uses the template style in which it is added.