-
Template Customization
- Adding a different logo for each language
- Adding a new favicon.ico to Joomla
- Adding Google Analytics code to your Joomla template
- Adding new Google fonts
- Applying color to a single menu item in Joomla
- Applying custom CSS to a single Joomla module
- Converting the search field to a module position
- Creating a new module position in the header area of your template
- Customising the dropdown menu styling
- Editing the mobile menu title - 'MENU'
- Hide the component/article area on a page
- Localize web fonts
- Mobile Menu - Linking parent items
The following tutorial was generously detailed by Oliver on our forums (https://www.joomla51.com/forum/localze-web-fonts).
Currently the fonts are almost all Google Webfonts that are called directly form the Google fonts server. In the European GDPR it is recommended to localize the font files so there is no connection to a Google server, which stores personalized data like IP addresses in the US. The following steps details how this can be done within your Joomla51 template.
- I got to https://google-webfonts-helper.herokuapp.com/fonts and search the font I am using (or more than one but than one after the other). I check the styles I want to use and copy the css code. This code I store in a CSS file which I call local-fonts.css and upload it to templates/j51_xxx/css/
- Then i download the prepared ZIP file at the end of the css code section on the webfonts helper page. I unpack it and upload the font files to templates/j51_xxx/fonts/ . Now the references in the CSS file local-fonts.css point to the correct font files (e.g.: url('../fonts/gudea-v10-latin-regular.woff2') format('woff2') points to ../fonts/ which is the directory whrere I uploaded the font files)
- The last step is the most critical one, because it will be overwritten in case of a template update. I open the file templates/j51_xxx/inc/fonts.php. There I disable the lines with the loop, starting with..
foreach ($googlefonts as $v) { // loopBelow this line add...$app->getDocument()->addStyleSheet('/templates/j51_xxx/css/local-fonts.css');
With Joomla's excellent out of the box language functionality, a common query is how to apply a different logo to your Joomla template for each available language. In the following tutorial we will detail how this can be achieved using multiple template styles. This method will be the same for any Joomla template which allows you to set your own logo within the template style parameters.
You will repeat the following steps for each language you wish to apply a new logo excluding your current default language which will continue to use your default template style.
-
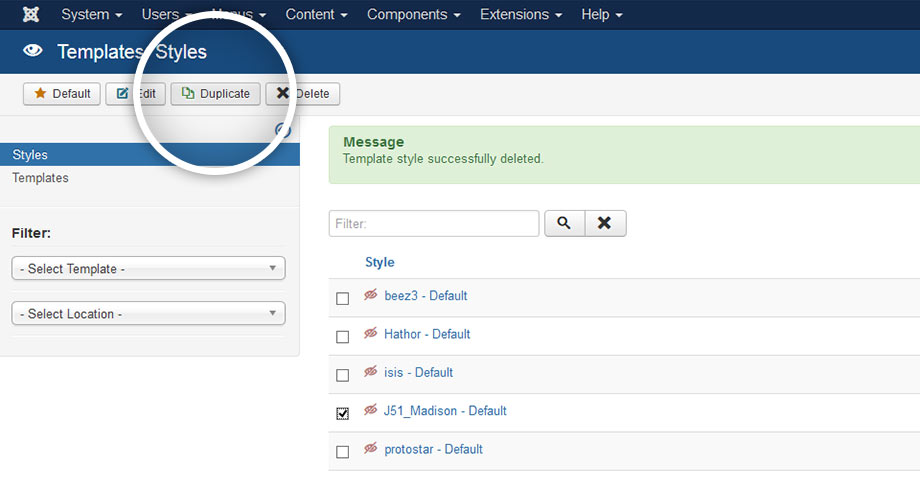
Firstly duplicate your default template style. To do so navigate to your Template Manager (Extensions -> Templates), check the box next to your default template style and click 'Duplicate'.
-
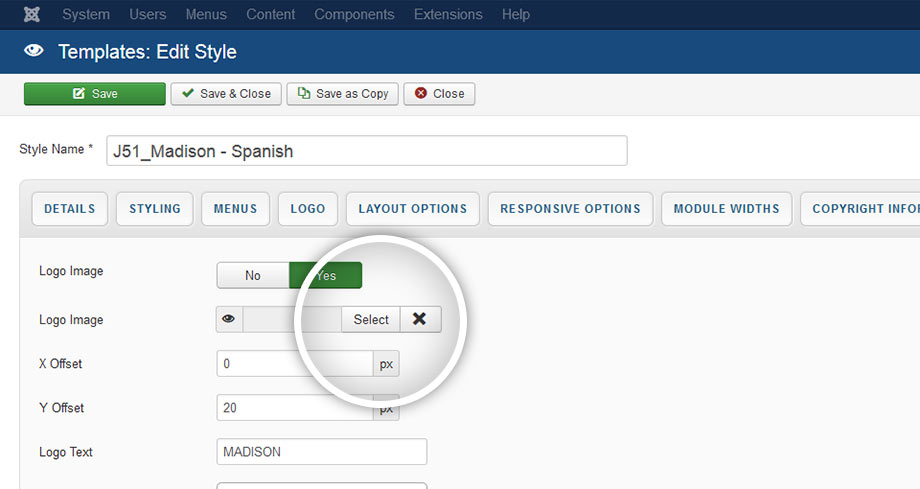
Click in to your new template style. This will mostly be indicated by a (2) after the title. Rename your new template style title to something more suitable (eg. Your Template - Spanish), indicating the language to which this template style will be applied to.
-
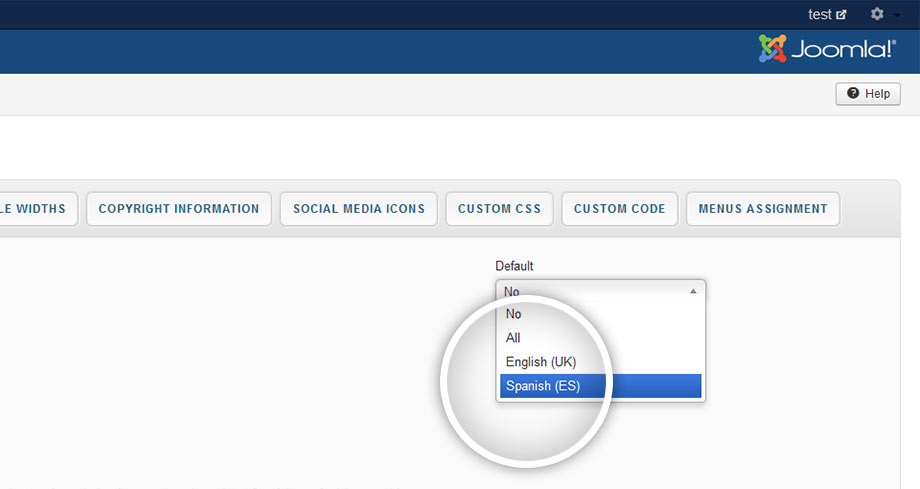
By default the 'Details' tab should be in display. Within this tab click the 'Default' dropdown option to the top right of the tab. From this dropdown select the language you wish this template style to be applied to (Eg. Spanish(ES)).
-
For the next step we will apply our new logo to this template style. Most professional template will allow you to edit the logo within these same template parameters however method will vary slightly from one template provider to the next. Presuming you are using a Joomla51 template, click the 'Logo' tab and in the field provided select your new logo.
-
Once selected click 'Save & Close'. Your logo is now set to only display with the chosen language.
To ensure the best possible viewing across all devices, responsive Joomla51 template include a touch friendly mobile version of the top main navigation. This menu is displayed once your site is viewed on a small screen device in place of the standard menu seen on a desktop computer. In the mobile version of the menu, if your main navigation includes sub menu items, these items are indicated by an arrow next to the parent of the sub menu items. Clicking the parent item will then open a dropdown containing the sub menu items. This is a suitable solution as long as the parent item is not a link itself. In the following steps we will detail how to amend your template to allow the parent item text to be clickable which touching the remainder of the button will open the sub menu items dropdown.
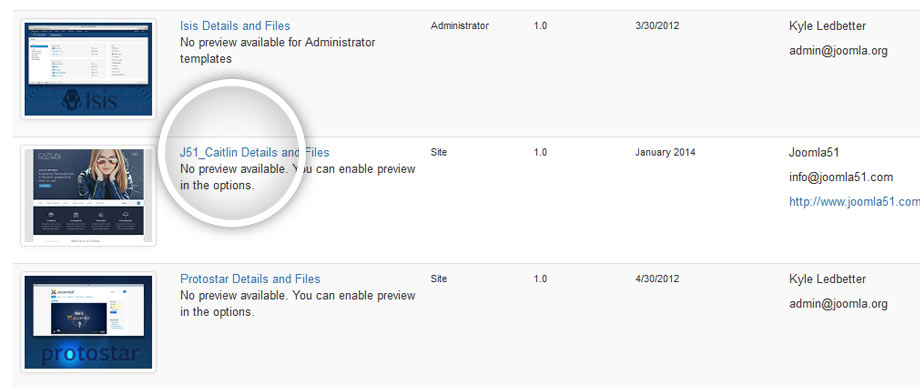
- From your Joomla administration navigate to Extensions -> Templates -> Templates -> J51_Template Details and Files
- In the template folder tree navigate to ../js/responsive-nav/responsive-nav.js. For more recent template releases this file has been renamed and moved to ../js/jquery.slicknav.js. If your template contains a ../js/jquery.slicknav.min.js then it is advised to copy the contents of your edited ../js/jquery.slicknav.js to the min file.
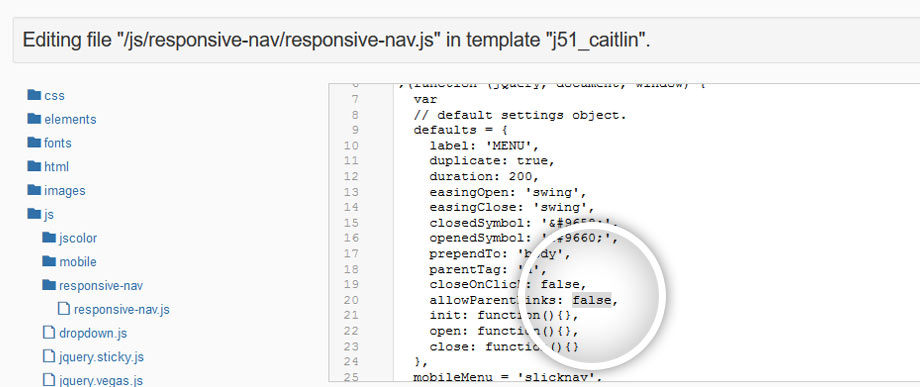
- Locate the following line (approx. line 20)..
allowParentLinks: false,
And set to true..allowParentLinks: true,
- Hit 'Save & Close'
The parent menu item text should now be clickable while touching the remainder of the button will open the dropdown containing the sub menu items.
Applying a unique color to a single menu item is a great way of adding focus to that item. In the following tutorial we will detail how you can edit the styling of a single menu item using some custom CSS.
The following steps focus on Joomla51 templates however the same method should apply regardless of the template you are using. If your template does not include a Custom CSS option, try adding the CSS to the end of your templates CSS file.
-
Within your Joomla administration navigate to the menu which contains the menu item you wish to style (Menus -> [YourMenu]).
-
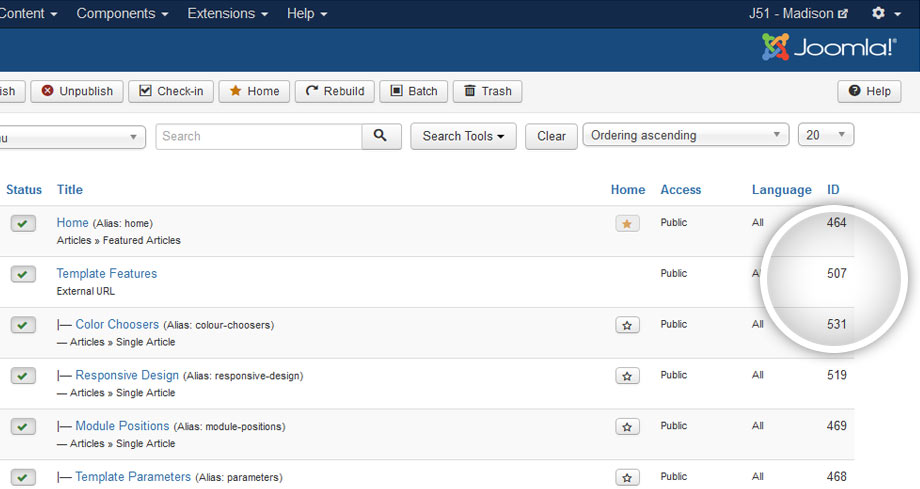
Joomla assigns a unique ID to each menu item. We are going to use this ID when styling the item. Under the ID column of your menu items, take note of the ID for the menu item you wish to style (Eg. 507).
-
Using your menu item ID we will add some CSS to your template using the 'Custom CSS' field of your templates parameters. Navigate to Extensions -> Templates and click in to your template settings. Select the 'Custom CSS' tab and add the following CSS to the field provided, editing the ID to match that of your menu item and the color to your own taste.
.item-507, .item-507 > a {
    color: #D14233 !important;
}
Hit 'Save & Close' to apply your custom CSS.
In the following tutorial we will detail a number of CSS snippets which will allow you to edit the styling of some of the elements of the top menu dropdown menus. Each of these snippets can be edited to your own taste and added using the 'Custom CSS' field of your templates parameters. To access the 'Custom CSS' field, from your Joomla administration navigate to Extensions -> Templates -> [YourTemplateStyle] -> Custom CSS.
Note that for some of our newer template releases we haved added styling options for the top menu dropdown menu directly within the templates parameters. To access these options navigate to Extensions -> Templates -> [YourTemplateStyle] -> Menus. Where available these styling options would be easier than using the following snippets, so be sure to check the above first before adding these snippets.
Dropdown Background Color
The following will allow you to set the background color of your dropdown menu where #EEEEEE is your new background color(edit to taste).
.hornav ul ul {
    background-color: #EEEEEE;
}
Dropdown Menu Item Color
The following will allow you to set the menu item color of your dropdown menu where #555555 is your new menu item color(edit to taste).
.hornav ul ul li a {
    color: #555555;
}
Dropdown Menu Item Hover Color
The following will allow you to set the menu item hover color of your dropdown where #000000 is your new menu item text color and #DDDDDD is your new menu item background color (edit to taste).
.hornav ul ul li:hover a {
    background-color: #DDDDDD
    color: #000000;
}
Font Awesome Icon Color
A number of our templates allow you to prepend each menu item with a Font Awesome of your choice. The following will allow you to set color of these icons where #777777 is your new icon color (edit to taste).
.hornav .menu li li [class^="fa-"]::before,
.hornav .menu li li [class*=" fa-"]::before {
    color: #777777;
}
Adding a Border Radius to your Dropdown Menu
The following will allow you to add/edit a border radius to your dropdown menu giving your dropdown rounded corners where 8px is your new border radius (edit to taste).
.hornav ul ul {
    border-radius: 8px;
}
You can also add a border width and color by using the following (edit to taste).
.hornav ul ul {
    border: 3px solid #777777;
    border-radius: 8px;
}
Highlighting the Current Item in your Dropdown Menu
And lastly you can use the following if you wish to style the current menu item in your dropdown where #000000 is your current menu item text color and #DDDDDD is your current menu item background color (edit to taste).
.hornav ul ul li.current > a {
    background-color: #DDDDDD
    color: #000000;
}